How to remove bga chip? Removing BGA chip is a delicate and intricate process that requires precision, patience, and the right tools. BGA chips are widely used in modern electronic devices due to their high density and efficient thermal performance. However, their removal and replacement pose a significant challenge due to their complex structure and small size. This article provides a comprehensive guide on how to safely and effectively remove a BGA chip from a printed circuit board (PCB).
Understanding BGA Chips
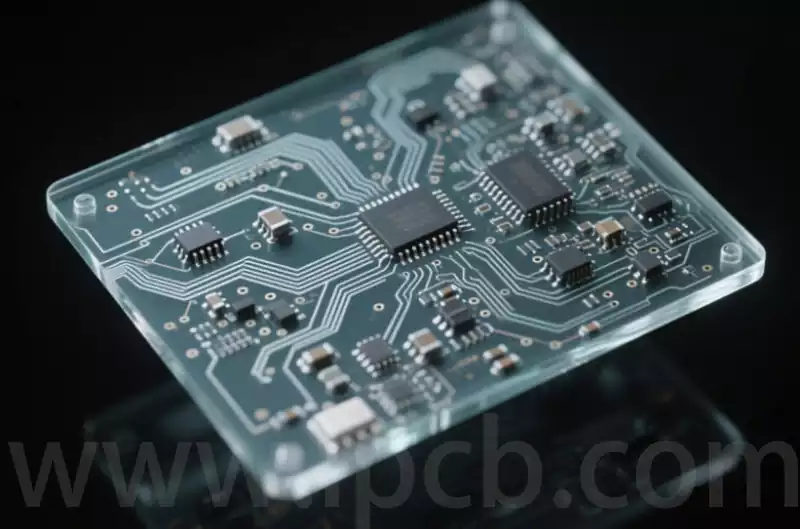
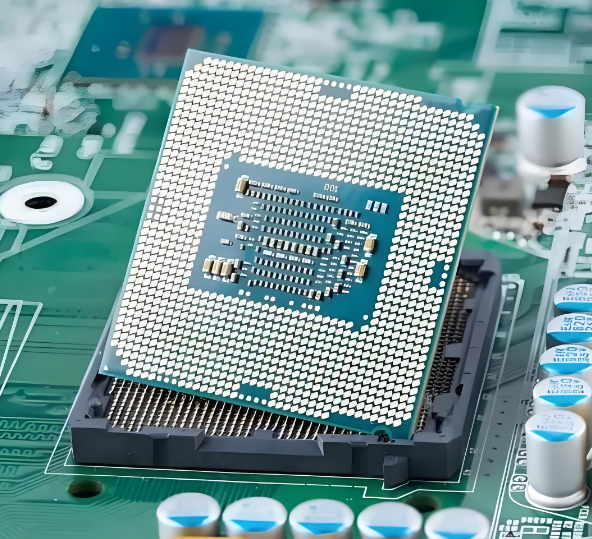
Before diving into the removal process, it is essential to understand what a BGA chip is and why it is commonly used in electronics. A BGA chip is a type of surface-mount packaging used for integrated circuits. It provides more interconnection pins than other packages, allowing for higher performance and more complex functionality in smaller spaces. The connections are made through solder balls on the underside of the chip, which align with corresponding pads on the PCB.
Why Use BGA Chips?
BGA chips are favored for several reasons:
- High Pin Count: BGA packages can accommodate a large number of pins, making them ideal for complex circuits.
- Efficient Heat Dissipation: The design allows for better thermal performance, which is crucial for high-power applications.
- Compact Size: BGA chips are more compact compared to other packages with similar pin counts, saving valuable space on the PCB.
Understanding these benefits is crucial as it highlights why careful removal is necessary to avoid damaging these valuable components.
Tools and Materials Needed
To remove a BGA chip, you will need the following tools and materials:
- Hot Air Rework Station: This tool provides controlled heat to melt the solder balls beneath the BGA chip without damaging the surrounding components.
- Soldering Iron and Solder Wick: These are used for cleaning up the residual solder after the chip is removed.
- Flux: Flux helps to prevent oxidation and improves the flow of solder, making it easier to remove the chip.
- Tweezers: Precision tweezers are essential for handling small components during the process.
- PCB Holder or Stand: This keeps the PCB steady during the removal process.
- Thermocouple or Temperature Probe: This ensures that the correct temperature is maintained to avoid damaging the PCB or components.
- Magnifying Lamp or Microscope: This helps in inspecting the solder joints and ensuring proper alignment and removal.
Step-by-Step Removal Process
Step 1: Preparation
Begin by securing the PCB on a stable holder or stand to prevent movement during the process. Clean the area around the BGA chip with isopropyl alcohol to remove any dust or debris that could interfere with the removal.
Step 2: Apply Flux
Apply a generous amount of flux around the edges of the BGA chip. Flux is crucial as it helps to prevent the oxidation of solder joints and facilitates the melting process, making it easier to lift the chip off the PCB.
Step 3: Heating
Set your hot air rework station to the appropriate temperature. This typically ranges between 220°C and 250°C, but it can vary depending on the specific BGA chip and PCB. Use a thermocouple or temperature probe to monitor the heat. Direct the hot air nozzle at the BGA chip, moving it in a circular motion to ensure even heating.
Step 4: Removing the Chip
Once the solder has melted (you can usually see the flux starting to bubble), gently lift the BGA chip using precision tweezers. Be careful not to apply too much force, as this can damage the PCB pads. If the chip does not lift easily, continue applying heat for a few more seconds.
Step 5: Cleaning the PCB
After the BGA chip is removed, there will be residual solder left on the PCB pads. Use a soldering iron and solder wick to clean up these pads. Place the solder wick on the pads and gently press with the soldering iron until the solder is absorbed into the wick. Clean the area again with isopropyl alcohol to remove any remaining flux residue.
Step 6: Inspection
Inspect the PCB pads under a magnifying lamp or microscope to ensure they are clean and undamaged. Proper inspection is crucial to avoid issues when soldering a new chip in place. If any pads are damaged, they may need to be repaired before proceeding with a new chip.
Step 7: Post-Removal Cleaning
Once the PCB pads are inspected and found to be in good condition, perform a final cleaning. Use a soft brush and isopropyl alcohol to gently scrub the area. This ensures that no residue or contaminants remain that could affect the performance of the new chip.
Tips for Successful BGA Chip Removal
- Practice Patience: Rushing the process can lead to damaged components or PCB. Take your time to ensure even heating and careful handling.
- Proper Equipment: Using the right tools, especially a quality hot air rework station, can make a significant difference in the ease and success of the removal process.
- Temperature Control: Maintaining the correct temperature is crucial. Too high a temperature can damage the PCB, while too low a temperature will not melt the solder properly.
- Consistent Heat Distribution: Moving the hot air nozzle in a circular or sweeping motion helps to distribute heat evenly across the chip.
- Flux is Your Friend: Don’t skimp on flux. It significantly aids the removal process by preventing oxidation and helping the solder to flow.
Common Challenges and Solutions
Solder Balls Not Melting
If the solder balls under the BGA chip are not melting, it could be due to insufficient heat or uneven distribution. Ensure that your hot air rework station is set to the correct temperature and that you are moving the nozzle in a consistent pattern. Applying more flux can also help.
Lifting Pads or Tracks
Applying too much force when lifting the chip can damage the PCB pads or tracks. Always ensure that the solder is fully melted before attempting to lift the chip. If you do damage a pad or track, it may be necessary to repair it using specialized PCB repair techniques.
Residual Solder Cleanup
Residual solder can sometimes be stubborn to remove. Using a high-quality solder wick and ensuring that your soldering iron is at the right temperature can help. Apply a small amount of flux to the solder wick to improve its effectiveness.
Component Damage
Other components on the PCB can be damaged if they are exposed to excessive heat. Using a heat shield or Kapton tape to protect surrounding components can help mitigate this risk.
Safety Considerations
Personal Safety
Working with high temperatures and delicate components can pose certain risks. Always wear safety goggles to protect your eyes from solder splashes. Use heat-resistant gloves to prevent burns, and work in a well-ventilated area to avoid inhaling fumes from the flux and solder.
Equipment Safety
Ensure that your hot air rework station and soldering iron are in good working condition. Regularly check the power cords and tips for any signs of wear or damage. Using faulty equipment can lead to inconsistent heating and potential damage to your components.
PCB and Component Safety
To avoid static discharge damage, always use an anti-static wrist strap when working with PCBs and electronic components. Handle the PCB by its edges and avoid touching the pads and traces directly. This helps to prevent oils and contaminants from your skin from affecting the soldering process.
Advanced Techniques for BGA Chip Removal
Preheating the PCB
In some cases, preheating the entire PCB before focusing on the BGA chip can make the removal process easier. Preheating helps to reduce the thermal shock to the PCB and components, leading to a more even heat distribution. Use a preheating plate set to a lower temperature (around 100°C to 150°C) to gradually warm up the PCB before applying the hot air rework station directly to the BGA chip.
Using a BGA Rework Station
For professionals or those frequently working with BGA chips, investing in a dedicated BGA rework station can be beneficial. These stations provide precise control over temperature and airflow, often including features such as vacuum pickup tools for safe and easy chip removal. They also typically have programmable profiles tailored to specific BGA chips, ensuring optimal heating and cooling cycles.
Infrared Heating
Infrared (IR) heating is another advanced technique used in BGA chip removal. IR rework stations use infrared radiation to heat the solder joints evenly without direct airflow. This method can be particularly useful for densely populated PCBs where traditional hot air rework might disturb nearby components. However, it requires careful monitoring to prevent overheating.
Final Thoughts
Removing a BGA chip is a technical and challenging task that requires precision, the right tools, and a careful approach. By following the steps outlined in this guide, you can successfully remove a BGA chip without damaging your PCB or components. Practice and patience are key, as well as a thorough understanding of the equipment and materials you are using. With these skills and knowledge, you can effectively manage BGA chip removal and replacement in various electronic devices.
Understanding the nuances of the process and being prepared for potential challenges will significantly increase your chances of success. Whether you are a hobbyist or a professional, mastering BGA chip removal is a valuable skill that will enhance your ability to repair and innovate in the field of electronics.