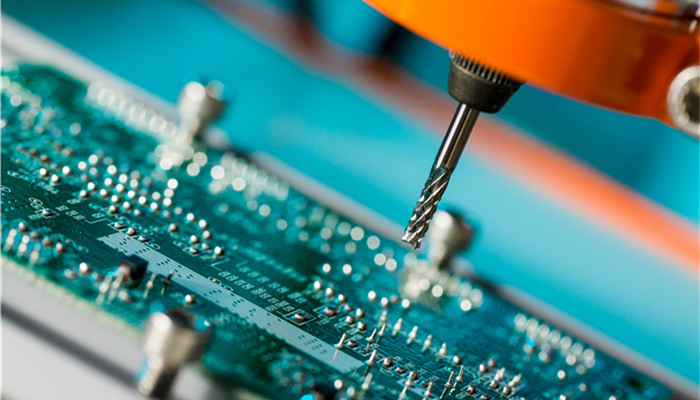
PCB microsection is a technology that utilizes high-precision equipment and a special process to make fine cuts on circuit boards. Compared with traditional cutting methods, microsection technology has higher precision and a smaller error margin, enabling precise cutting of tiny components and fine lines on circuit boards.
Anatomical destructive slicing methods for circuit boards can be broadly categorized into three types:
General slicing (declared name micro slicing)
Vertical slicing (VerTIcal SecTIon) can be performed on buried holes and other areas of the surface that are filled with adhesive and dried, and horizontal slicing (Horizontal SecTIon) can also be performed on buried holes, which is a commonly used method in general.
Cutting holes
Is to be careful with a bare drill miter saw blade will be a row of buried holes from the center of the cut into two halves, or with sandpaper to grind off half of a row of buried holes, will be cut in half without sealing buried holes placed in a 20x-40x stereo microscope (or solid line optical microscope) under the view of all the conditions of the surface layer of the big half. At this time, if the back of the pad will also be ground very thin, then the wall or material will be fully transparent, can carry out led backlight method (Back light) to check the hole copper layer covering the situation.
Slant cut into pieces (45 ° or 30 °)
Solid wood multi-layer board surface area or buried holes in the area of 45 ° cut angle between the layers, followed by a solid line microscope to observe the 45 ° cross-section on the electrical conductors between the situation.
Technique
Except for the second type of microsecting, which is used to observe the original surface of half of the hole wall, the rest of the first and third types need to be carefully polished at the end in order to see the real situation, which is the key to the success or failure of the microsecting, and this point is very important and should not be taken lightly. The following are the key points of the production process.
- Sampling
With a special cutting mold from any place on the board to take samples or cut samples with a shearing machine, pay attention to not too close to the edge of the hole, in order to prevent the through-hole caused by tension and deformation, but also should pay attention to the sampling method, the best first cut cut down, and then use the diamond saw blade to cut down the cut samples, to reduce the mechanical stress of the aftermath of the problem.
- Sealing
The purpose of sealant is to fill the hole, the hole wall to be observed fixed clamping, so that in the grinding will not be dragged to extend and distortion, sealant is generally used with special state-of-the-art dense commodities, Buhler’s series of state-of-the-art sealant is preferred, but the price is very expensive, can be changed to use other kinds of transparency and good hardness, less bubbles is preferred, such as: black epoxy resin used for sealing small parts, toothpaste-like two-liquid Type epoxy resin sealant, Nanbao resin, even green paint can be filled, attention to reduce air bubbles as a matter of importance, in order to make the hardening complete, more need to be catalyzed by the oven to make a rapid reaction.
In order to make the sealing of the cut samples easy to carry out, the official method is to use a kind of roll-flexing spring clamps, the sample piece clamped into, so that in the sealing of the adhesive to maintain an upright state. Formal slices of the sealing gel body is poured into a cylindrical blue rubber mold, hardened as long as the rubber mold can be easily pushed out of the sample cylinder, very convenient. This special rubber mold is also Buhler’s products and not easy to buy in the country, the general practice of the more troublesome and easy to do:
(1) in the sawn aluminum tube sprayed with release agent on the inner wall, another sample with double-sided tape upright in the glass plate, and then set the aluminum tube around the sample, to make the lower edge of the tube and the surface of the glass plate, so that the glue does not leak out, to be hardened to take out the cylinder or change the funnel sloping wall-shaped mold is easier to demold.
(2) with powdered glue in the hot press mold with increasing pressure to fill the holes and harden at the same time to become a solid, in a variety of slices of the round body, the most beautiful to this kind.
(3) A number of slices are strung together with steel tails in special molds that are filled with liquid glue at the same time, allowing for multiple slices to be ground at the same time, known as the Nelson-Zimmer method, which allows for nine cylinders to be ground at the same time, with as many as 5.6 slices being sealed in each column, making this a large number of practices.
(4) with the purchase of ready-made acrylic molds, the sample piece will be placed, sealing glue can be.
(5) the simplest practice is to apply the gel on PE paper, so that the cut samples of the through-hole slowly scraped across the surface of the glue, forcing the gel paste squeezed into the hole, and then poured into the slot slot into the board, focused into the oven, so that it is baked hard, but also can be changed to fill the glue with green paint.
(6) a small number of cut samples can be used directly in the aperture of the bamboo stick to fill the glue, and then baked upright hard, the last two kinds of colloid is very little, so the grinding time can be saved, but to maintain the level of the grinding surface, to rely on the work and gestures, but really good slices are made from this kind of simple method.
3.Grinding
Is to use the cutting force of sandpaper to grind the sample piece to the center of the hole, in order to observe the hole wall section of the step. In order to save time for a large number of productions, mostly with a fast turntable to do fast grinding method, can be used with adhesive backed sandpaper on the surface of the disk, can also be used to fix the edge of the turn-like fixtures will be fixed gauze paper, or paper has a center hole into the heart of the rotary axis, in the water wet and high-speed rotation; sandpaper will be flat on the surface of the disk and can be ground. A small number of simple cut samples as long as the hand in general sandpaper can be flat grinding even the turntable can also be eliminated, the sandpaper used in the above number to the following appropriate.
(1) No. 220 rough grinding to the hole wall fault of the two parallel lines will appear until, pay attention to spray water or other kinds of liquid to reduce heat.
(2) Switch to No. 400 and then grind until the “center of the hole” of the “indicator line” appears.
(3) Switch to 600 fine sandpaper to gently grind a few times to correct the non-parallel oblique grinding can be.
- Polishing
To see the truth of the slices, you must do a careful polishing to eliminate sandpaper scratches. When a large number of turntable type blanket with aluminum oxide suspension as an additive, do turn micro-contact polishing, pay attention to the polishing to change the direction of the cut samples from time to time, so that there is a more uniform effect, until the sand marks completely disappeared. A small number of cut samples can be changed to general cloth head, and wipe the copper ointment can be carried out, but also to change the direction of the throwing movement, front and back, left and right, as well as circular movement, craftwork to do a good job, the effect should be more than high-speed turntable polishing to be more clear, better able to preserve the truth, but more time-consuming. Polishing pressure should be light, the number of reciprocation to be more, the effect is better, and the truth of the copper surface of the oil polishing than the water-based polishing is better. - Micro-etching
Polished surface will be washed with water or dilute alcohol and blow-dry, can be micro-etching, in order to find out the respective level of the metal, as well as the crystallization of the situation, such micro-etching seems simple, but to see the true image of the clear and delicate, but it’s not easy, not every time must be successful. Not when only lightly thrown several times, redo the micro-etching, to find the true image. The formula for the micro-etching solution is as follows:
“10 cc ammonia + 10 cc pure water + 2?3 drops hydrogen peroxide.”
Mixed uniformly, you can use a cotton swab dipped in liquid, gently rubbed on the surface of the slice for about 2 seconds, pay attention to the copper surface at the phenomenon of gas bubbles, 2?3 seconds after the etching solution immediately rinsed off with water, and immediately dry with toilet paper, do not make the copper surface continues to oxidize, otherwise 100x microscope will appear brownish black and rough copper surface, good micro-etching will show bright red copper color, and crystallization and demarcation of the clear.
Note that the above micro-etching solution can only last up to 1 hour, cotton swabs used 1-2 times should also be replaced, so as not to contaminate the copper surface on the cut surface of the crystallization. Readers need to do more exploration, since you can find out the reason.
Early with “chromic acid (Cr03) add a small amount of sulfuric acid and salt method” has been outdated, and will make the tin-lead layer black, should not be used again, ammonia law tin-lead surface is still white, which is common in the distribution of the black spots that are more lead area phenomenon.
To do research and judgment of the slice must be carefully polished and micro-etching work, otherwise only wasted effort, the general shipment of a large number of slices, had to collectively polished, before checking the micro-etching, so at least you can see the true image of 8.9 points. - Photography
If the original polished film for 100 points, then by the microscope to see the inverted image, according to the performance of the microscope can only see 85%? 95% of the degree, and photographed with a Polaroid, the best is only 80%? 90%, by the Polaroid film and then turned into a slide, of course, more to be discounted by 75%? 85%, but for the purpose of recording and communication, photography is the best method, this kind of film is very expensive! However, in order to record and communicate, photography is the best method, and this kind of film is very expensive. The most difficult thing about taking pictures is the alignment of the focal length, which is very difficult.
(1) The visual focal length is not exactly the same as the photographic focal length, so the visual focus should not prevail, and it is necessary to sacrifice a few more to find out the real photographic focal length.
(2) The amount of light required for exposure = light intensity x time, a good film should try to extend the time and reduce the light intensity, plus a variety of filters can be obtained after a variety of different effects of the film.
(3) The image surface must be flat, otherwise the multiplier is large, (100x or more) there will be a partially clear partially fuzzy phenomenon, get like, to dry thoroughly before touching, to avoid causing damage to the picture.
Circuit board microsection technology is an indispensable technology in the electronic manufacturing industry. It provides strong support for the manufacture and maintenance of electronic equipment with its high precision, high efficiency and high reliability. With the continuous progress of science and technology and growing demand, micro-cutting technology will be more widely used and developed.