what tool to cut keyboard pcb? First of all, cutting boards is a must for many reasons. One common reason is that some of the projects you are working on require board sizes that are not easy to source unless you are willing to invest more money and negotiate with the manufacturer. Therefore, you may have no choice but to cut the larger PCB into smaller but customized sizes.
However, it is not uncommon today for organizations and professionals to purchase large PCBs and then cut them into customized sizes. This method has also proven to be more cost-effective, saving you money even if you have to cut the printed circuit board to the right size.
Why do you need to cut PCBs?
Cutting PCBs is an important process for customizing and optimizing electronic projects. There are several reasons for cutting PCBs, which we will discuss here.
Personalizing Boards from Panel Arrays
When you work with PCBs, you often come across PCB panelization, where multiple smaller boards are mass-produced and connected together to form an array. These interconnected boards, commonly called boards, are organized together to simplify the production process. Nonetheless, in order to utilize each PCB, they must be removed from the panel by cutting. The cutting process plays an important role in isolating these boards and preparing them for integration into your project.
Resizing or Reshaping
Sometimes you may need to resize or reshape a PCB to make it fit into a device. Whether you are working on a gadget or want to change the board configuration, cutting is the way to go. Resizing allows you to reduce the size of a PCB to make it fit your project requirements. Reshaping gives you the ability to adjust the layout of a board. This adaptability plays an important role in making electronic products or reconfiguring an existing board for a new purpose.
Removing Damaged Sections
You may need to cut a PCB to remove damaged sections. This process is essential when parts of a board are faulty or damaged. By cutting the damaged area, you can prevent these problems from affecting the entire circuit. Removing damaged sections also allows you to salvage the rest of the PCB, ensuring that the remaining components function properly. This helps you maintain the quality and reliability of your electronics project.
Salvage Functional Subsections
Sometimes, you need to cut a PCB to salvage a functional subsection. If a portion of the board is damaged or unnecessary for your project, cutting allows you to save and use the section that is still working properly. This can help you make the most of your materials, reduce waste, and ensure that the functional parts of your PCB are fully utilized. Salvaging these subsections is a cost-effective way to reuse your board for other applications or repairs.
- PCB slicing skills
- Ensure the flatness of the PCB board
Before cutting the PCB board, it needs to be polished and flat. Otherwise, the cut board may have a large error, which will affect the quality of the entire circuit board. Therefore, in practical applications, it is necessary to select a relatively flat PCB board, or take other methods to ensure the flatness of the board. - Reasonable design of PCB cutting path
Before cutting the PCB board, a good design is required. When planning the incision position, the overall structure of the PCB board needs to be considered and a suitable cutting path should be adopted. Generally speaking, the shorter the cutting path, the smaller the error will be, which improves the processing efficiency. - Use appropriate cutting methods
In practical applications, there are many ways to cut PCB boards, such as machine cutting, manual cutting, laser cutting, etc. The choice of cutting method needs to be based on actual conditions. Manual cutting is more user-friendly than tools, and the cutting direction and angle can be adjusted as needed, which is suitable for small batch production. Laser cutting is very suitable for cutting soft PCB boards with high precision requirements.
Tools Required for Cutting Keyboard PCB
Before discussing how to cut PCB boards, let’s first take a look at the tools that are usually required for cutting PCB boards. With these tools, you can cut boards much easier than before. Here are some of the tools that you will need to do the job.
- Heavy-duty scissors, blades, or precision cutters. Both of these cutters can be used to cut PCBs without the need for a large cutter. Heavy-duty scissors are similar to regular scissors, but are sturdier and heavier and are used to cut thicker objects such as printed circuit boards, while precision cutters are special cutters that can cut PCBs by hand. If you don’t have a precision cutter, you can use an ]abletop paper cutter or table saw as an alternative.
- Sandpaper. Usually, sandpaper is not required in the process of cutting PCB boards. However, in rare cases, the cuts in the circuit board may leave rough edges that need to be sanded down to give it a polished and finished look after cutting.
- Grid or ruler. The purpose of the grid and ruler when cutting a printed circuit board is to measure the PCB, but this is used in conjunction with markers to place the points where the PCB is to be cut.
- Markers. Markers will help you cut the PCB as they are used to indicate the dimensions of the printed circuit board. It is also used to create a guide line showing the path of the blade you will use. Ideally, you want to use an easily removable marker for this project.
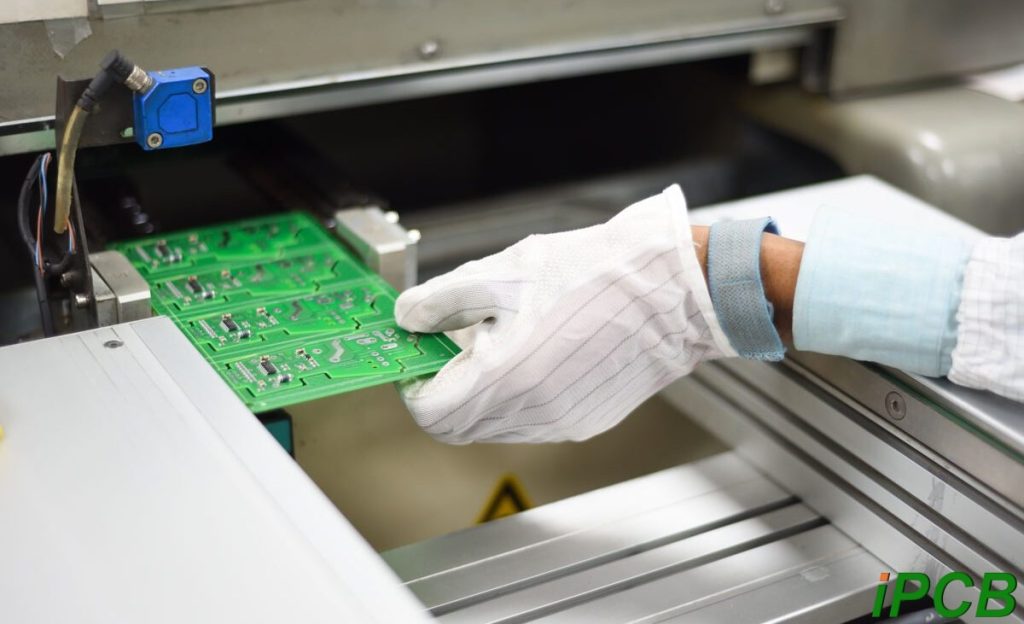
- Safety gloves. Be aware that cutting PCB boards means that your hands may get cut or stained with dirt. Wearing safety gloves ensures that your hands stay clean and avoid getting cut.

Steps to Cutting PCBs
what tool to cut keyboard pcb? In the following content, we will discuss in detail how to cut PCB boards. We will look at the techniques and practices that need to be paid attention to when cutting PCB boards correctly. Each step needs to be completed correctly to ensure that the custom-sized printed circuit boards meet the dimensions required for your project.
- Clean before cutting
Before cutting the PCB board, you need to clean the board to be cut to the appropriate size. Use a clean cloth to clean the board so that any debris or dust on the PCB is removed, leaving the board surface clean for use. - Measure and mark
Use a ruler and pen to measure the PCB to be cut to the appropriate size. Use a marker to mark the “cut” point and path on the board. The path indicates the line that the blade will follow, while the cut point is the corner. Both indicators will give you an idea of how big your custom cut board will be. You can then use a utility knife to carve out the grooves along the marked path. - Slide a piece of paper underneath the PCB in the work area
Before cutting the PCB to the desired size, slide the paper underneath the PCB. The purpose of this step is to prevent fraying and scratching on one side of the printed circuit while cutting. - Slowly and steadily cut the board to size
Use a knife or heavy-duty scissors to slowly but steadily cut the board to the desired size. Since the board is made of very fragile material, try to be gentle while cutting along the marked or grooved area. You don’t want to cause damage due to excessive pressure while cutting the board to the desired size.
Carefully cut the end points of the board to complete the sizing. Check the edges of the PCB to see if the cut is almost consistent or if there are any rough edges. - Smooth the edges and wipe them again
If there are any rough edges left after cutting, it is recommended that you use sandpaper to smooth them out. Sand the rough edges until they present a consistent appearance so that your board will present a perfect appearance after cutting.
After the edge smoothing is completed, or if the edge is already smooth after cutting, cut the PCB into the required size and wipe it again to clean it.
Classification of PCB board cutting methods
- Machine cutting
Machine cutting is a fast and accurate method that can automatically track the cut line and complete the cutting process at high speed. However, the machine cutting method is relatively convenient, suitable for mass production, and the cost is relatively high.
- Manual cutting
Manual cutting is a convenient and free method that is easy to use and easy to operate. It can also adjust the cut angle as needed, which is suitable for small batch production scenarios.
- Laser cutting
Laser cutting is a new type of cutting method that uses a highly concentrated laser beam to quickly penetrate the PCB board to achieve precise and high-speed cutting effects. This method is suitable for any shape of cut design, and the cut is relatively flatter and more accurate, and is very suitable for cutting flexible PCB boards.
Safety tips for cutting keyboard PCBs
Cutting is a very difficult task, especially PCB cutting. You must ensure safety while maintaining the quality of the PCB. Following these safety tips ensures that you work safely and effectively.
Use a Magnifying Glass
When cutting PCBs, using a magnifying glass is essential for achieving precise results. Magnification ranges from 5x to 30x. This magnification helps you see small details that are difficult to discern with the naked eye. By seeing the features of the board clearly, you can make more accurate cuts and avoid mistakes. This extra caution ensures that your cuts are clean and the final product is of high quality. Using a magnifying glass is a simple and effective way to improve your cutting accuracy and the overall quality of your work.
Keep Your Tools Sharp
To ensure safe and efficient PCB cutting, always keep your tools sharp. Sharp tools make cleaner cuts and reduce the risk of accidents. Dull blades or knives can cause PCBs to crack or break unevenly, leading to errors or damage. Check and sharpen your tools regularly to maintain their performance. This simple practice will not only improve your cutting accuracy, but also make the process smoother and safer. Keeping your tools in top condition is a vital safety tip when working with PCBs.
Do a Test Run
Before cutting a PCB, always do a test run. Since PCBs come in different materials and thicknesses, each PCB may perform differently during the cutting process. Testing can help you understand how the material reacts and allow you to adjust your technique as needed. This step ensures that you achieve a clean cut and stay safe throughout the process. By testing first, you can minimize the risk of damaging the PCB and improve the overall accuracy of the cut.
Multiple Sanding
After cutting, the edges may become rough or sharp. Sanding helps eliminate these flaws and ensure professional results. Start by sanding the edges with a coarser sandpaper, then switch to a finer sandpaper for a smoother surface. This step not only enhances the appearance of the PCB, but also prevents potential damage or injury caused by sharp edges. Proper sanding helps improve the overall quality and safety of the final product.
In the production process of electronic products, the processing of PCB boards can be said to be a very important part. To achieve the precision processing of keyboard PCB boards, it is necessary to master the keyboard PCB slicing skills and PCB board cutting methods. what tool to cut keyboard pcb is particularly important.


