Keyboard as an important bridge of human-computer interaction, the stability and reliability of its performance is crucial. As the “heart” of the keyboard, the design and maintenance of the keyboard PCB is directly related to the overall performance of the keyboard.
How to design a keyboard pcb
Keyboard pcb design process covers the entire process from conception to finished product, specifically divided into the following four major stages:
Schematic Design: As the cornerstone of keyboard PCB design, schematic design determines the overall structure of the circuit, the signal transmission path and the interconnection between the components. In this stage, the designer will carefully plan the circuit structure to ensure smooth signal transmission and effective connection between components.
PCB Layout Design: This stage focuses on the spatial layout of the pcb board and the placement of components. The designer will consider the signal transmission distance and signal impedance control needs to ensure that the layout is both compact and reasonable, while ensuring the efficiency and stability of signal transmission.
PCB alignment design: The alignment design is a key part of the signal transmission path. At this stage, the designer will carefully plan the signal guidance and wiring methods, focusing on the overall direction of the signal and the signal level of the division, in order to ensure that the signal transmission is clear and accurate.
Board production and testing: After the design is completed, the board production stage is entered. This stage includes PCB manufacturing, quality testing and assembly testing of keyboards or other devices. Through strict quality control, we ensure that the PCB board meets the design requirements and the keyboard performance is stable and reliable.
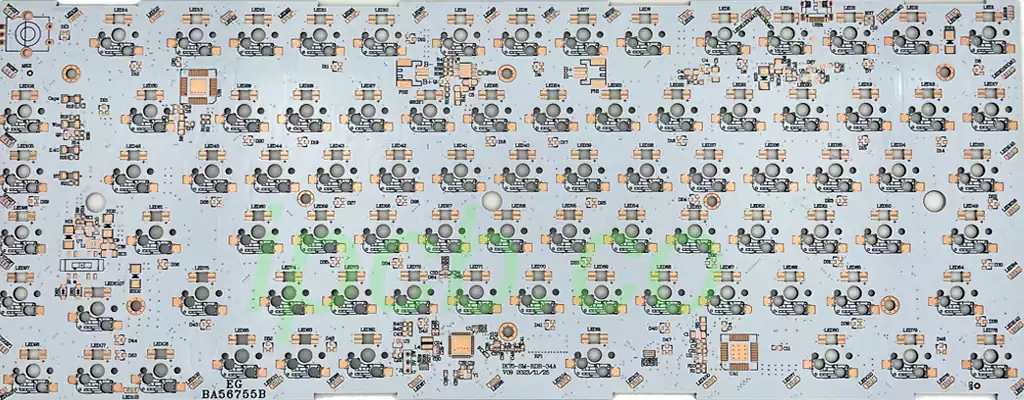
Component Layout
Component layout is a crucial part of keyboard PCB design. It directly determines the relationship between the components and the reliability of signal transmission. Usually, designers will layout the input and output ports and power and ground pins on both ends of the PCB board to maintain the balance of signal transmission. For complex keyboard PCB boards, designers will use modular layout strategy to divide the board into multiple functional modules for easy subsequent testing and maintenance.
Signal Impedance Control
Signal impedance control is a key technique to ensure stable and improved transmission performance of keyboard PCBs. In order to maintain signal quality and transmission effect, designers will accurately match and control the signal impedance. For example, in the high-speed USB interface design, by ensuring that the differential signal impedance is stabilized at about 90 ohms, the stability and reliability of high-speed data transmission can be effectively guaranteed.
Electromagnetic compatibility design
Electromagnetic compatibility (EMC) design is an indispensable part of keyboard PCB design. It requires designers to fully consider the design of power supply noise, radiation noise, scattering interference and other issues to ensure that electronic equipment in a variety of operating conditions can work properly and not interfere with other equipment. In the keyboard pcb design, designers will pay special attention to the separation of the signal line and power line layout, while using grounding and isolation of interference sources of measures to ensure the correctness of the signal and the stability of the keyboard.
As an indispensable input device for our daily work and entertainment, the Printed Circuit Board inside the keyboard is a key part of the keyboard to ensure its proper functioning.However, over time, dust, dirt and other impurities may accumulate on the PCB, which may not only affect the performance of the keyboard, but also cause damage to the circuitry. Therefore, it is important to clean the keyboard PCB substrate regularly.
How to clean keyboard pcb
Preparation
Before you start cleaning, make sure you have prepared the following tools:
Soft bristle brush: for removing larger dust and impurities.
Dust-free cloth or cotton swabs: for wiping away smaller stains and dirt.Professional cleaner: It is recommended to use a cleaner specifically designed for electronic devices, avoid cleaners containing alcohol or strong acids and alkalis.
Anti-static gloves: to prevent static electricity from damaging the PCB.Hair dryer (optional): for blowing away hard-to-remove dust.
Removing the Keyboard
Before cleaning the PCB board, the keyboard needs to be disassembled. This process varies by keyboard model and brand, but usually involves steps such as removing the keycaps, set screws, and board connectors. During the disassembly process, it is important to proceed with care to avoid damaging any components.
Cleaning the PCB
Initial dusting: Use a soft-bristle brush to gently brush away large particles of dust and impurities on the PCB.Pay attention to the strength of the brush should be moderate to avoid scratching the PWB.
Deep cleaning: Spray professional cleaner on a dust-free cloth or cotton swab, then gently wipe the PCB surface. For difficult to remove stains, you can slightly increase the amount of cleaner or use a hair dryer to assist in removal.
Drying: After cleaning, let the PWB dry naturally or use a hair dryer (set to cold air) to speed up the drying process.Make sure the circuit board is completely dry before proceeding to the next step.PrecautionsAvoid using water for direct cleaning: Water may cause short circuits or damage PCB components.
Avoid using strong acidic and alkaline cleaners: these may corrode the PCB surface or electronic components.
Handle with care: During disassembly and cleaning, always handle with care to avoid damaging any parts of the keyboard.
Regular Cleaning: To maintain optimal performance and longevity of the keyboard, it is recommended to clean the keyboard PCB regularly.
Although the design and cleaning of the keyboard PCB may seem like a minor part of keyboard manufacturing and maintenance, it has a significant impact on the overall performance and life of the keyboard.