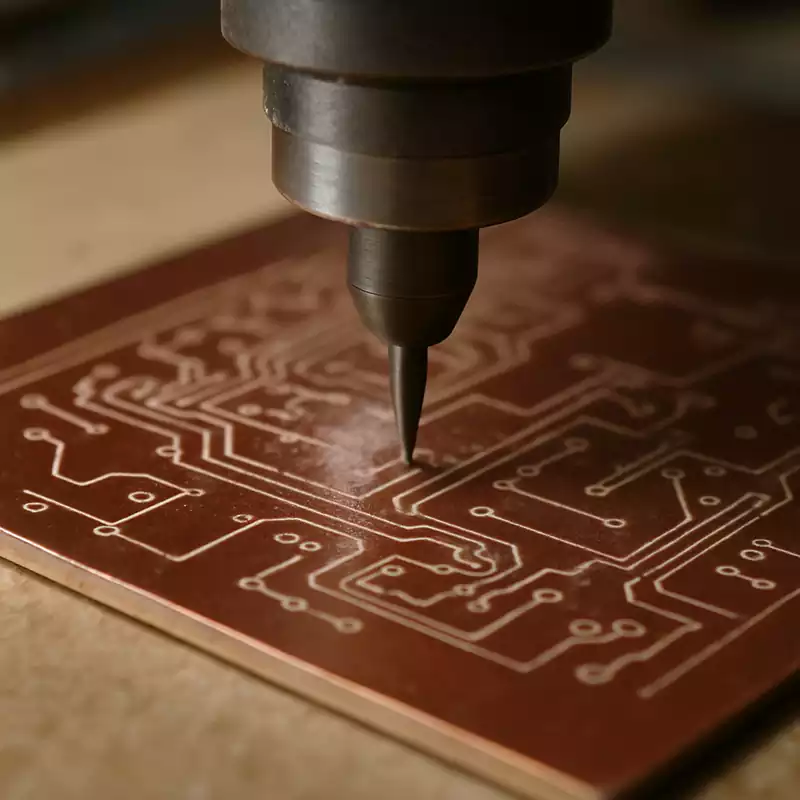
What is milling pcb board? Milling pcb board is a subtractive manufacturing process that removes material from a blank board using a rotating cutting tool to form the circuit paths required for electronic components. This method is particularly suited to rapid and precise prototyping without the need for chemical etching processes.
PCB milling employs computer numerical control (CNC) machinery to carve circuit pathways into copper-clad laminates. Unlike traditional etching, which relies on chemical solvents to remove excess copper foil, milling physically cuts away surplus material. This more hands-on manufacturing approach is particularly advantageous for small-batch or bespoke projects.
Milling pcb board technology has undergone significant evolution over the years. Once a niche process confined to specialist fields, it has become a widely applicable solution through advances in CNC technology and its increasing accessibility. This transformation has democratised PCB production, enabling small organisations and individual hobbyists to fabricate professional-grade circuit boards.
While both milling and etching can produce high-quality PCBs, they exhibit distinct differences. Traditionally, etching has been favoured for its high efficiency in volume production. In contrast, milling offers both precision and flexibility, making it particularly suited for prototyping and small-batch production. Understanding these distinctions helps you select the appropriate method for your project.
Advantages of Milling PCB Boards
Speed and Efficiency
The core strength of milling lies in rapid prototyping. The CNC machining process supports swift iterations, enabling designers to quickly validate and refine designs. This efficiency proves crucial in fast-paced development environments prioritising speed to market.
Precision and Detail Reproduction
CNC machines are renowned for their exceptional accuracy, which is vital for intricate PCB designs. The milling process achieves precise circuitry and complex shapes with minimal deviation, making it an ideal choice for high-precision applications. This precision ensures even the most complex designs are accurately translated into physical circuit boards.
Environmental Benefits
Unlike traditional etching processes involving hazardous chemicals, milling is a clean process. It eliminates the need for chemical waste disposal, reducing the environmental impact of PCB production. For sustainability-conscious users, milling offers an eco-friendly alternative without compromising quality.
Customisation and Flexibility
Milling offers unparalleled flexibility in design and customisation. Whether handling one-off projects or requiring ad-hoc adjustments, CNC milling processes readily accommodate changes. This adaptability makes it the preferred method for designers seeking bespoke solutions.
Milling PCB Board Process
Step 1: Equipment Calibration
Correctly setting up the milling machine is crucial for achieving high-quality machining.
Installing End Mills
Select the appropriate end mill for the task. Small-diameter tools are suitable for fine line machining, while larger-diameter tools are better suited for cutting through panels. Ensure the end mill is securely mounted to prevent vibration and errors during milling.
Securing the Circuit Board
Firmly clamp the copper-clad board to the milling machine’s worktable. Ensure the board is perfectly level to prevent uneven cuts. Correct installation is vital for maintaining milling precision and quality.
Organising the Work Area
Maintain a clean, clutter-free workspace. An orderly environment minimises contamination risks and ensures smooth machine operation.
Step 2: Calibration
Calibration is essential for precise and efficient machine operation.
Zeroing Procedure
Prior to cutting, calibrate the machine by setting zero points for each axis (X, Y, Z) to guarantee accuracy. Correct calibration prevents alignment errors, ensuring designs are milled precisely.
Parameter Adjustment
Configure milling speed, feed rate, and cutting depth according to the PCB material and design specifications. These parameters vary with design complexity and dimensions; meticulous adjustment is essential.
Test Run
Conduct a trial run on scrap material to validate parameter settings and verify equipment functionality before processing actual PCBs.
Step 3: Milling
Once all settings and calibration are complete, commence milling.
Initiating the Milling Process
Import the design file into the CNC software and activate the milling sequence. Closely monitor the machine’s operational status to ensure smooth progress and make timely parameter adjustments. Real-time oversight facilitates early issue detection, preventing significant damage.
Drilling and Cutting
Following contour milling, utilise the CNC machine to drill necessary holes and cut the PCB outline. Ensure all cutting and drilling operations are precise to prevent complications in subsequent processing stages.
Continuous Monitoring
Monitor the milling process throughout to confirm equipment functionality and adherence to design specifications. Immediately pause or terminate processing upon detecting any anomalies.
Step 4: Final Finishing
Upon completion of milling, proceed with final processing and inspection of the circuit board.
Cleaning the Circuit Board
Remove all burrs or rough edges using fine-grit sandpaper or deburring tools. Cleaning ensures the board is ready for component placement and soldering, preventing potential short-circuit risks.
PCB Inspection
Examine for defects or incomplete traces, and verify conductivity using a multimeter. Comprehensive testing ensures the PCB functions correctly and meets design specifications.
Final Adjustments
Perform any necessary final adjustments or repairs to the PCB. This may involve manually correcting minor issues or optimising the PCB’s appearance and functionality.
Key Points for Successful PCB Milling
Achieving successful PCB milling requires attention to detail and adherence to best practices.
Material Selection
Opt for high-quality copper-clad laminates to achieve superior results. Thicker substrates may necessitate reduced milling speeds. Correct material selection ensures the PCB meets performance expectations and withstands the milling process.
Tool Maintenance
Regularly inspect and replace end mills to ensure clean cuts and prevent substrate damage. Well-maintained tools are crucial for maintaining machining accuracy and extending milling machine lifespan.
Software Updates
Timely updates to design and control software enhance functional compatibility. Regular releases typically include bug fixes and new features that optimise milling workflows.
Practice and Exploration
Experiment with varying parameter settings and operational techniques. Hands-on experience drives process refinement, enabling you to discover novel approaches for superior outcomes.
For electronics designers,milling pcb board represents a valuable skill. With the appropriate tools and techniques, you can produce precise, customised PCBs without chemical processes. By following this guide, you will progressively master CNC PCB milling technology, breathing new life into your electronic projects.
Whether you are a novice or an experienced professional, mastering the intricacies of milling pcb board will significantly enhance the quality and efficiency of your prototyping.