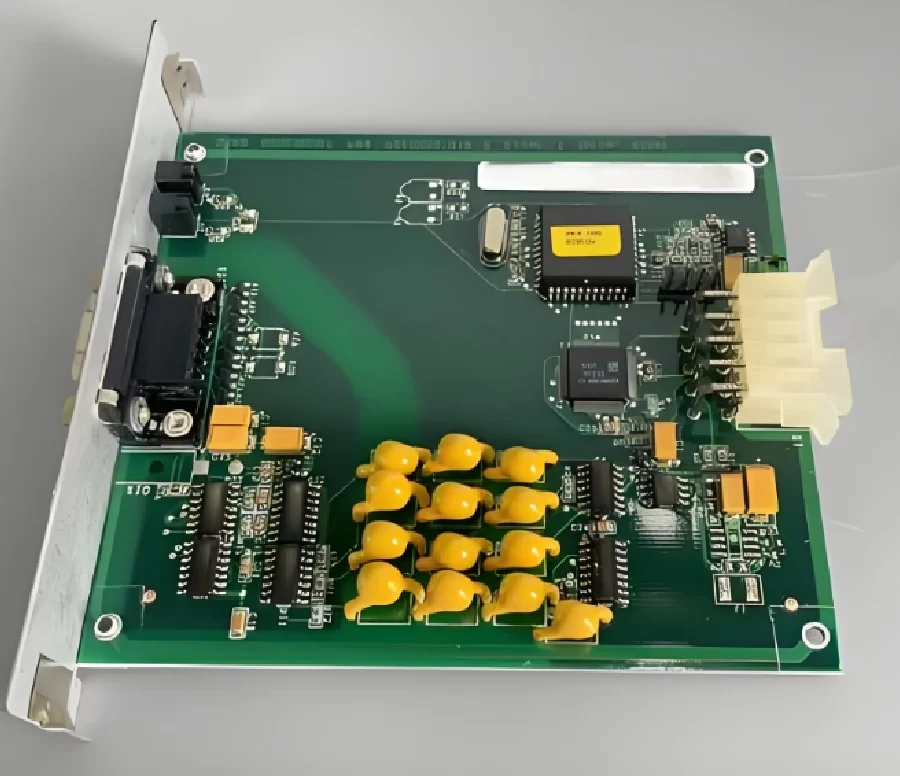
Knowing how to clean amplifier circuit board assemblies correctly is essential when dust, flux residue, nicotine, oil or moisture begins to affect audio performance and long-term reliability. Cleaning, however, is not simply a matter of spraying solvent over the PCB. An amplifier may contain charged power-supply capacitors, solvent-sensitive components, adjustable controls and closely spaced high-voltage conductors. An unsuitable cleaning method can therefore create more damage than the original contamination.
A reliable cleaning process begins by identifying what is on the circuit board, where it came from and whether it is electrically active. Dry dust, rosin flux, water-soluble flux and corrosive liquid residue require different treatment. The objective is not merely to make the PCB look clean. The objective is to remove contamination without damaging component materials, redistributing conductive residue or leaving moisture beneath packages.
Why Contamination Matters in an Amplifier
An audio amplifier circuit board handles signals with very different voltage and current levels. Its input stage may process signals of only a few millivolts, while the power stage and power supply carry much larger currents. Contamination that has little visible effect around a speaker-output terminal may cause noise, leakage or instability around a high-impedance input circuit.
Ordinary dust is not always strongly conductive when dry. Once it absorbs moisture, however, a layer of dust can support surface leakage between closely spaced conductors. Dust also acts as thermal insulation when it accumulates around power transistors, heat sinks and ventilation paths.
Flux residue creates a different risk. Properly controlled no-clean flux may remain electrically acceptable after assembly, but excessive, overheated or contaminated residue can retain moisture and collect dust. Water-soluble flux is more active and must be removed using a compatible controlled process.
Liquid spills are more serious because they can introduce salts, sugars, acids or other ionic contaminants. Even after the visible liquid has evaporated, these substances can remain on the PCB and become conductive again when humidity rises.
The Safety Problem Comes Before Cleaning
An amplifier must be disconnected from mains power before its enclosure is opened. Disconnecting the power cord does not mean the internal circuit is immediately safe. Large electrolytic capacitors in the power supply can retain dangerous voltage after the amplifier has been switched off.
Never discharge a capacitor by shorting its terminals with a screwdriver. This can produce a high-current arc, damage the capacitor, lift PCB copper or cause personal injury. Capacitor discharge should follow the manufacturer’s service procedure and use an appropriately rated resistor and insulated measurement equipment.
Before touching the board, verify the remaining voltage with a suitable meter. If the amplifier contains valve circuitry, high-voltage power rails, direct mains sections or unfamiliar power-supply construction, cleaning should be left to a qualified technician.
The board should also be protected against electrostatic discharge. Sensitive DSP devices, operational amplifiers, wireless modules and control processors may be damaged by static electricity even when no visible spark occurs.
Identify the Contaminant Before Selecting a Cleaner
The correct cleaning material depends on the contaminant.
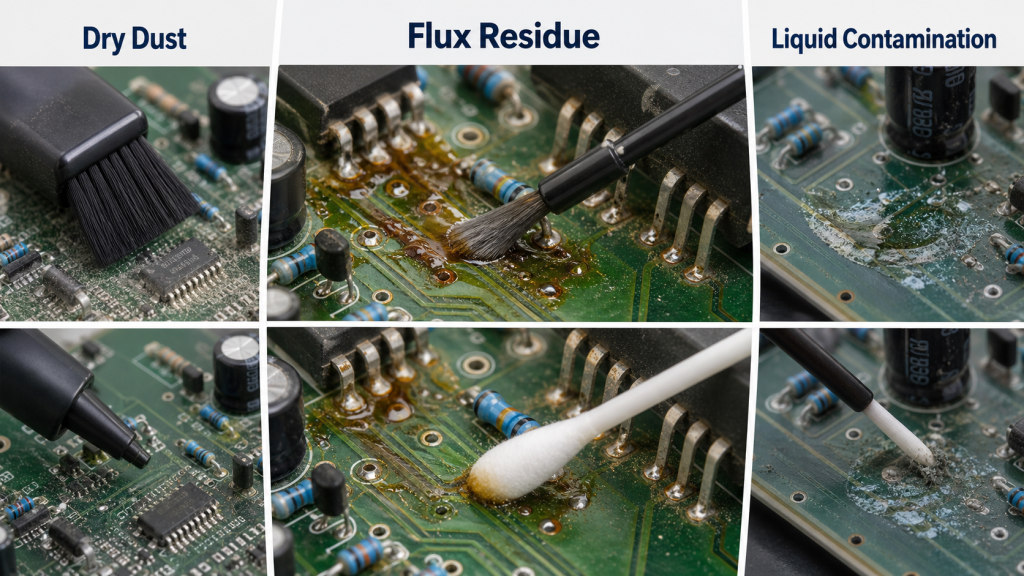
Loose dust should first be removed without introducing liquid. A soft ESD-safe brush and controlled low-pressure air can lift dust from component bodies, heat sinks and open PCB surfaces. Excessive air pressure should be avoided because it can damage small components, force contamination beneath packages or overspeed cooling fans.
Rosin flux and light oily contamination can often be removed with high-purity isopropyl alcohol. A concentration of 90 percent or higher is generally preferred because it contains less water and evaporates more cleanly than household rubbing alcohol.
Isopropyl alcohol is not universally safe for every component. It may affect some printed markings, plastics, adhesives, conformal coatings and optical materials. It should not be allowed to flood potentiometers, switches, relays, meters, displays or sealed electromechanical components unless their manufacturer confirms compatibility.
Water-soluble flux normally requires a controlled aqueous cleaning process. Deionised water may be used in professional PCB cleaning, but tap water should not be used because it can deposit minerals and ionic residue. Aqueous cleaning also requires thorough rinsing and controlled drying, particularly beneath QFN packages, connectors and other components with small stand-off heights.
Aggressive solvents such as acetone, paint thinner, petrol and chlorinated cleaners should not be used. General-purpose lubricants and water-displacing sprays are also unsuitable because they can leave oily films that attract dust and change surface insulation resistance.
Preparing the Amplifier Circuit Board
Before cleaning begins, photograph cable positions, connector orientation and mechanical hardware. Amplifiers often contain similar connectors that can be reinstalled incorrectly. Marking each connection reduces the risk of creating a new fault during reassembly.
If practical, remove the PCB from the chassis. Cleaning a board while it remains above transformers, displays, speakers or wiring can carry dissolved contamination into areas that were previously clean.
Examine the board before applying solvent. Look for burnt resistors, overheated solder joints, leaking electrolytic capacitors, corrosion, cracked components and discoloured laminate. Cleaning cannot correct an electrical failure, and it may temporarily hide evidence needed for diagnosis.
A leaking electrolytic capacitor requires particular attention. Electrolyte residue may be corrosive and can travel beneath the component or along PCB traces. The failed capacitor must be replaced, and the affected area must be cleaned according to the electrolyte chemistry and board condition.
Controlled Cleaning of the PCB Surface
For ordinary dry dust, begin with the least aggressive method. Hold the board so that loosened material falls away rather than deeper into connectors. Use a soft brush to lift dust while applying gentle air from a safe distance.
If solvent cleaning is required, apply a small amount of high-purity isopropyl alcohol to an ESD-safe brush or lint-free swab rather than flooding the entire board. Work on a limited area at a time. The solvent should dissolve the residue, while the brush moves it away from component leads and conductor gaps.
Simply brushing dissolved flux across the board does not remove it. Once the residue has entered the solvent, it must be absorbed with a clean lint-free wipe or rinsed away using fresh compatible cleaner. Reusing a contaminated swab can redistribute the same material over a wider area.
Extra care is required around fine-pitch ICs. Capillary action can draw contaminated solvent beneath the package, where evaporation is slower. Use only enough solvent to dissolve the residue and continue with fresh cleaner until the extracted liquid no longer carries visible contamination.
Connectors, switches and potentiometers should be treated separately from the open PCB surface. Standard board-cleaning solvent may remove lubricant from a potentiometer or carry residue into a sealed relay. If these parts require cleaning, use a product specifically approved for that component type.
Why Drying Is Part of the Cleaning Process
A board that appears dry on the surface may still contain solvent or water beneath components. Residual moisture can reduce insulation resistance, interfere with high-impedance circuits and cause corrosion after power is restored.
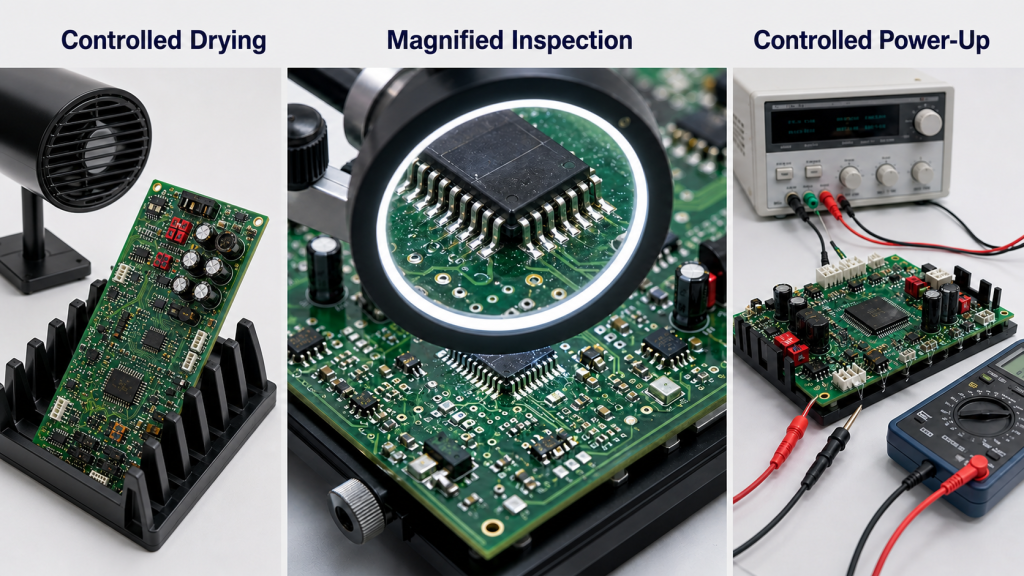
Allow the PCB to drain in a position that does not trap liquid beneath connectors or large packages. Drying should take place in a clean, ventilated environment. Gentle warm airflow can accelerate evaporation, but excessive temperature can deform plastics, damage adhesives or stress components.
Do not use a domestic oven, open flame or uncontrolled heat gun. If an aqueous cleaning process has been used, professional temperature-controlled drying is preferable because water can remain beneath low-clearance packages for much longer than it remains on exposed surfaces.
Power should not be applied until the board is completely dry and a final inspection has confirmed that no fibres, brush fragments or loosened debris remain.
Inspection Before Power-Up
After cleaning, inspect the PCB under strong lighting and magnification. Residue often remains around IC leads, vias, solder-mask edges and the bases of large components. Corrosion can also continue beneath damaged solder mask even after the visible surface has been cleaned.
Check that no component was moved during brushing and that connector pins, jumper wires and adjustable components remain in their original positions. Look for solder bridges, lifted pads and cracked joints that may have been concealed by dirt.
The first power-up should be controlled. Professional repair environments may use a current-limited power source, mains isolation, a dim-bulb limiter or other equipment appropriate to the amplifier architecture. If there is evidence of a liquid spill, corrosion or power-stage damage, do not reconnect the amplifier directly to normal operation without electrical testing.
When Cleaning Is Not Enough
Noise, distortion or intermittent operation does not always mean the circuit board is dirty. Oxidised connectors, worn potentiometers, cracked solder joints, degraded capacitors, thermal damage and unstable bias circuits can produce similar symptoms.
Corrosion that has removed copper, damaged plated through holes or travelled beneath component packages requires repair rather than surface cleaning. Conductive liquid residue may also have caused electrical overstress before the board was disconnected.
Conformal-coated boards create another limitation. Cleaning should not remove or damage the coating unless recoating is included in the repair process. A broken coating edge can trap moisture and leave the board less protected than before.
The correct decision is sometimes to stop cleaning and perform fault diagnosis. Cosmetic improvement should never be mistaken for restored electrical reliability.
A Clean Board Must Also Be a Reliable Board
The purpose of cleaning an amplifier PCB is to restore surface cleanliness without introducing new electrical, chemical or mechanical risks. That requires identifying the contamination, selecting a compatible cleaner, controlling solvent volume and allowing sufficient drying time.
For manufacturers and repair teams, cleanliness should be evaluated as part of the complete process. Flux chemistry, stencil printing, reflow conditions, handling and storage all influence the amount and type of residue found on the finished board.
iPCB provides PCB assembly and manufacturing support with controlled soldering, inspection and cleaning processes for audio, industrial and consumer electronic products. Manufacturing decisions can be reviewed according to component sensitivity, cleanliness requirements and the intended operating environment.
Understanding how to clean amplifier circuit board assemblies correctly means knowing when to use dry removal, when a compatible solvent is necessary and when contamination indicates a deeper electrical failure. The best result is not simply a board that looks cleaner, but an amplifier that remains electrically stable, safe and reliable after the cleaning process.